May 22, 2026 · Censor Image
How to Censor Personal Info on a Screenshot Before Sharing
You take a screenshot to prove a point — a confusing bill, a funny chat, an order that went wrong, a bug report for support — and you drop it into a thread without a second look. But a raw screenshot is one of the most leak-prone images you can post. It often carries a full name, an email address, a home address, a phone number, an order ID or the last digits of a card, all sitting in plain text. The fix is quick: before the picture leaves your device, you censor an image by covering every sensitive detail. This guide walks through what to hide, which censor style is actually safe, and why the tool you choose to do it matters as much as the redaction itself.
Why posting raw personal info online is a real risk
A screenshot feels disposable, but once it is posted it is effectively permanent and public. It can be saved, re-shared, indexed by search engines and scraped into datasets. The pieces of text inside it do not stay harmless on their own — they get combined. A name plus a city, an email plus an order number, a partial card plus a billing address: each fragment is small, but together they are the raw material for identity theft, targeted phishing, account-recovery attacks and doxxing.
The category of data worth protecting has a name — personally identifiable information — and the safe habit is simple: treat any screenshot the way you would treat a paper document with your details on it. You would not pin your bank statement to a public board. Removing the identifying parts before you share is the digital version of that same instinct, and it takes about thirty seconds.
What to censor on a screenshot before you share it
Before a screenshot goes out, scan it once for everything that points back to a real person or account:
- Names and contact details — your name and anyone else's, email addresses, phone numbers, usernames and profile photos in a chat header.
- Addresses and locations — a shipping address on an order confirmation, a billing address, a pin on a map, a delivery label.
- Account and financial numbers — order IDs, invoice numbers, IBANs, the last digits of a card, balances, booking references and confirmation codes.
- Faces, signatures and ID details — a face in a profile picture, a handwritten signature, a passport or licence number on a document scan.
- Background clutter that locates you — a browser tab strip full of other sites, a notification preview, a license plate or house number visible in a photo.
A free image censor tool handles all of this in one pass — drop a separate shape on each detail, and each shape can carry its own censor style.
Blur, pixelate or black out — which censor is safe?
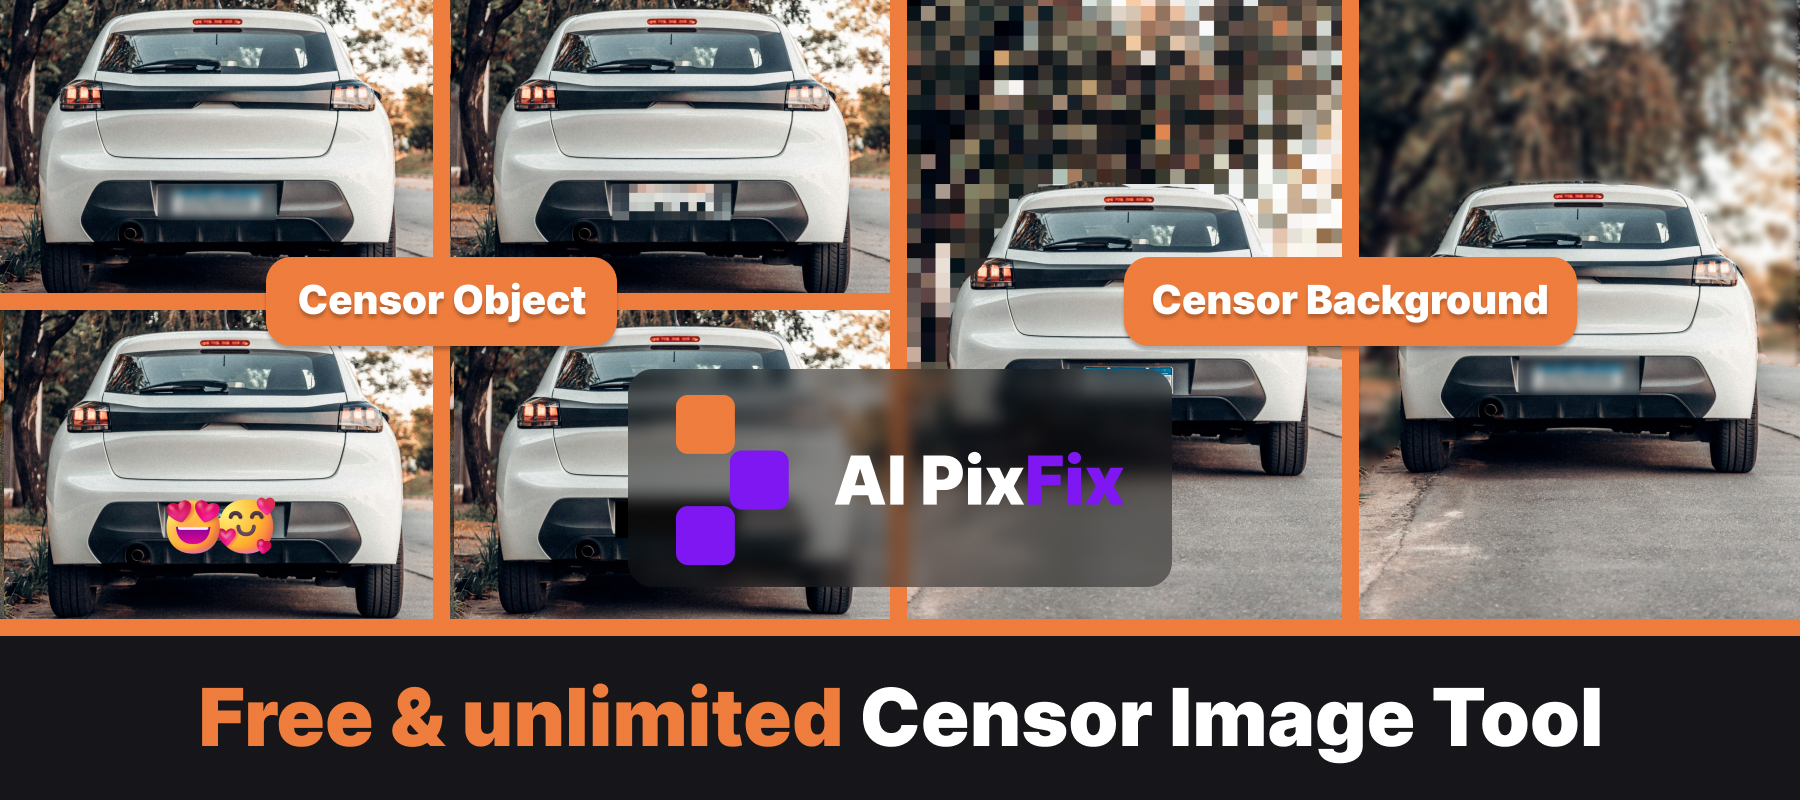
“Censor it” can mean four very different things, and they are not equally safe for text. The censor image tool gives you all of them on the same shape:
- Transparent blur — softens the area under the shape, with an intensity slider from a gentle 4 px haze up to a heavy 60 px frost. It reads as intentional and the surrounding colours bleed through, which looks clean on photos — but on short text it is the weakest option.
- Pixelate (pixelization) — replaces the area with a grid of large squares, the classic mosaic censor. A low square count makes the mosaic chunkier and safer; a high count leaves more recoverable detail.
- Solid black — wipes the pixels entirely. Nothing is left under the shape, so there is nothing to reconstruct. This is the only true redaction, and the right pick for names, addresses, ID and card numbers and signatures.
- Emoji — drops a yellow-face emoji over the area for a friendlier, fully opaque cover-up, handy for a face in a casual screenshot.
The rule of thumb: blur and pixelate are fine for faces and backgrounds, but for any text or number you want truly gone, use solid black. A light blur over a predictable string of characters can sometimes be partially reversed; an opaque block cannot.
How to censor a screenshot, step by step
Open the editor
Open the censor image editor in your browser and drop the screenshot in. PNG, JPG, WebP, AVIF and HEIC are all accepted, and the file never leaves your device.
Drop a shape over each detail
Click Circle or Rectangle to add a shape in the centre of the image, then drag it over the name, number or address and pull a corner handle to resize it.
Pick a censor style per shape
Set the style from the side panel — Solid black for text and numbers, Transparent blur or Pixelate for faces and photos, Emoji for a casual cover-up.
Repeat for every sensitive item
Add as many shapes as the screenshot needs. Each one moves, resizes and is styled independently, so one image can carry several redactions at once.
Save
Click Save result and download the image at its original resolution and format, with no watermark. The file name is appended with “censored by AI PixFix” so you never mix it up with the original.
Beyond boxes: the manual brush for complex shapes and backgrounds
A circle or a rectangle covers a line of text neatly, but plenty of things you need to hide are not box-shaped. That is what the manual brush is for. Instead of a fixed shape, you paint freehand across the image with an adjustable brush — the radius runs from a fine 8 px tip up to a broad 240 px sweep — so the censor can follow any outline you trace.
That makes it the right tool for the awkward cases: a winding handwritten signature, an irregular company logo, a tattoo, a license plate seen at an angle, or a person standing in the background of a photo. And because the brush can cover large areas, it works for whole backdrops too — paint over an entire busy background behind your subject in a few strokes, so the shop signs, street names, house numbers and other people that quietly give away a location are gone before you post the picture. Each painted area, like every shape, can be blurred, pixelated or blacked out independently with the online image censor tool.
The catch most people miss: where the file is processed
Here is the part that is easy to overlook. The screenshot you are censoring is, by definition, the one image you most want to keep private — it still holds the uncensored data until the moment you draw the shape. So it matters a great deal whether the tool does the work on your device or sends the file somewhere first.
Plenty of online image tools are server-based: you upload the original, a remote machine processes it, and you download the result. Take iLoveIMG specifically — it states in its own FAQ that “we just keep the files in our servers to allow you download your edited images,” after which the files are deleted. For iLoveIMG that is an honest and ordinary cloud workflow — but think about what it means for a redaction job: your uncensored screenshot, with every name and number still readable, has to travel to and sit on iLoveIMG's infrastructure before you ever hide anything.
The AI PixFix browser-based censor image tool decodes and edits the file entirely on your device with JavaScript — nothing is ever sent to a server, not even temporarily. You have personal information you want to hide; the honest question is whether you want the uncensored version of it sitting on a stranger's machine for any length of time at all. Keeping the whole job local removes that question entirely.
There is also the question of how you get to hide it — censoring is not one effect but several, and tools differ in how many they offer:
Frequently asked questions
What is the safest way to censor text on a screenshot?
Solid black. It overwrites the pixels under the shape completely, so once the censored image is downloaded there is nothing left underneath to reconstruct. A light transparent blur or a coarse pixel mosaic can sometimes be partially reversed on short, predictable text such as a name or a card number, so treat blur and pixelate as a stylistic censor and keep solid black for real redaction.
Can a blurred screenshot be un-blurred?
Sometimes. A gentle Gaussian blur over a small block of known-format text — an email address, a six-digit code, an account number — leaves enough structure for deblurring research models to make educated guesses. The risk drops to zero once the area is opaque, which is why solid black is the recommended style for any text or number that uniquely identifies you.
Do my screenshots get uploaded to a server?
Not with this tool. The image is decoded and censored entirely in your browser using JavaScript — your screenshot never leaves your device. That matters here more than on most tools, because the screenshot you are censoring is, by definition, the one that holds personal data.
How do I censor an oddly shaped area, not just a box?
Use the manual brush. Instead of a circle or rectangle, you paint freehand across the image with an adjustable brush, so a censor can follow an irregular outline — a winding signature, a logo, a person in the background, or an entire busy backdrop behind your subject.
Is the censor image tool free with no watermark?
Yes. Every blur, pixelate and black-out is free, there is no account and no daily cap, and the saved file is identical in resolution and format to what you uploaded — no watermark is added.
Share the screenshot, not the data. Open the censor image tool in your browser — drop a shape or paint over each sensitive detail, pick blur, pixelate or solid black, and save at the original resolution with nothing uploaded anywhere.
Censor a screenshot now