May 2, 2026 · B&W Filters
Best Black and White Filter for Portraits Online
Black and white photography removes color from the equation and forces the eye to read light, form, and texture directly. For portraits, that shift matters more than for any other subject: skin tone luminance, jaw shadow depth, eye catchlights, and hair separation against the background all depend entirely on how the conversion treats each color channel. Pick the wrong method and the result is a flat grey image where nothing separates. Pick the right one and the face comes forward, the background falls away, and the shot reads as intentional. Professional tools like Photoshop and Lightroom expose a dedicated channel mixer for this kind of control. The black and white filters on AI PixFix apply the same channel-mix logic directly in your browser — 16 presets, each calibrated for a distinct tonal result, free, with nothing to install and nothing to upload.
Why a channel mix beats simple desaturation for portraits
Black and white photography has a long history of using optical filters in front of the lens to alter how film recorded different colors as shades of grey. The underlying principle — shifting the luminance contribution of each color channel — is exactly what a digital channel mix replicates.
Straightforward desaturation maps every pixel using a fixed luminance formula. It works as a neutral baseline, but portrait skin often reads the same grey value as a pale blue sky, because both reflect broadly across the visible spectrum. The result: face and background merge at the same tone, and depth disappears.
A channel mix changes how much each color channel contributes to the final grey independently. Raise the red channel and anything red or pink in the original — skin, lips, warm light — maps to a brighter grey. Lower the blue channel and cool tones — clear sky, shadow, dark fabric — shift toward black. The subject's face separates from the background because the two have genuinely different tonal values after the conversion, not because of any post-processing trick.
This is the operation the B&W filter tool applies for each preset: every filter carries explicit r, g, and b weights that determine how each pixel maps to a grey value. The Canvas API computes the full pixel pipeline — channel mix, tone curve, vignette, grain, and optional split toning — entirely on your device.
Portrait-focused presets — what each one does
The 16 presets span four groups: Classic, Contrast, Bright, and Toned. For portrait work, these are the most relevant:
Red channel weighted at 0.75, green at 0.20, blue at 0.05. The heaviest red weighting of any preset. Warm and pink skin tones map to bright greys; blue skies and cool backgrounds drop dark. The classic darkroom technique — borrowed from placing a physical red filter in front of a film lens. Works best on portraits with warm complexions and a neutral or cool background.
Standard Rec.601 luminance weights (r=0.30, g=0.59, b=0.11). Balanced and predictable — no dramatic channel push in either direction. A reliable starting point when skin tone is not the main compositional element, or when you want an unbiased conversion to evaluate the tonal range first.
Red channel at 0.55, high contrast (0.50), vignette at 0.32, and grain at 0.12. Dense shadows, a radial darkening towards the frame edges, and analog grain texture. Directional light portraits with strong shadow side benefit most from this look — the vignette keeps the eye anchored to the face.
Contrast at -0.22 with a raised black point (blacks=0.24) and a slightly pulled-down white ceiling. The flat, lifted-blacks look common in fashion and editorial portrait photography — shadows never clip to pure black. Clean, contemporary.
A warm shadow tint (#4a3a28, amount 0.18) over cream highlights (#fff4e0, amount 0.10) on a balanced base mix. The result has a faintly warm cast in highlights and cooler mid-shadows — the look of platinum-palladium prints from early portrait photography.
A deeper shadow tint (#5c3020, amount 0.30) with warm cream highlights (#f8e4d0). More contrast in the shadow end than Platinum. Produces a rich, sepia-adjacent tone that works well for close-up portraits where skin texture detail matters.
How to apply a black and white filter to a portrait
Upload your photos
Drop up to 10 JPG, PNG, or WebP files into the upload zone — or click to browse. Photos load directly into your browser; nothing is sent to a server at any point.
Pick a B&W filter
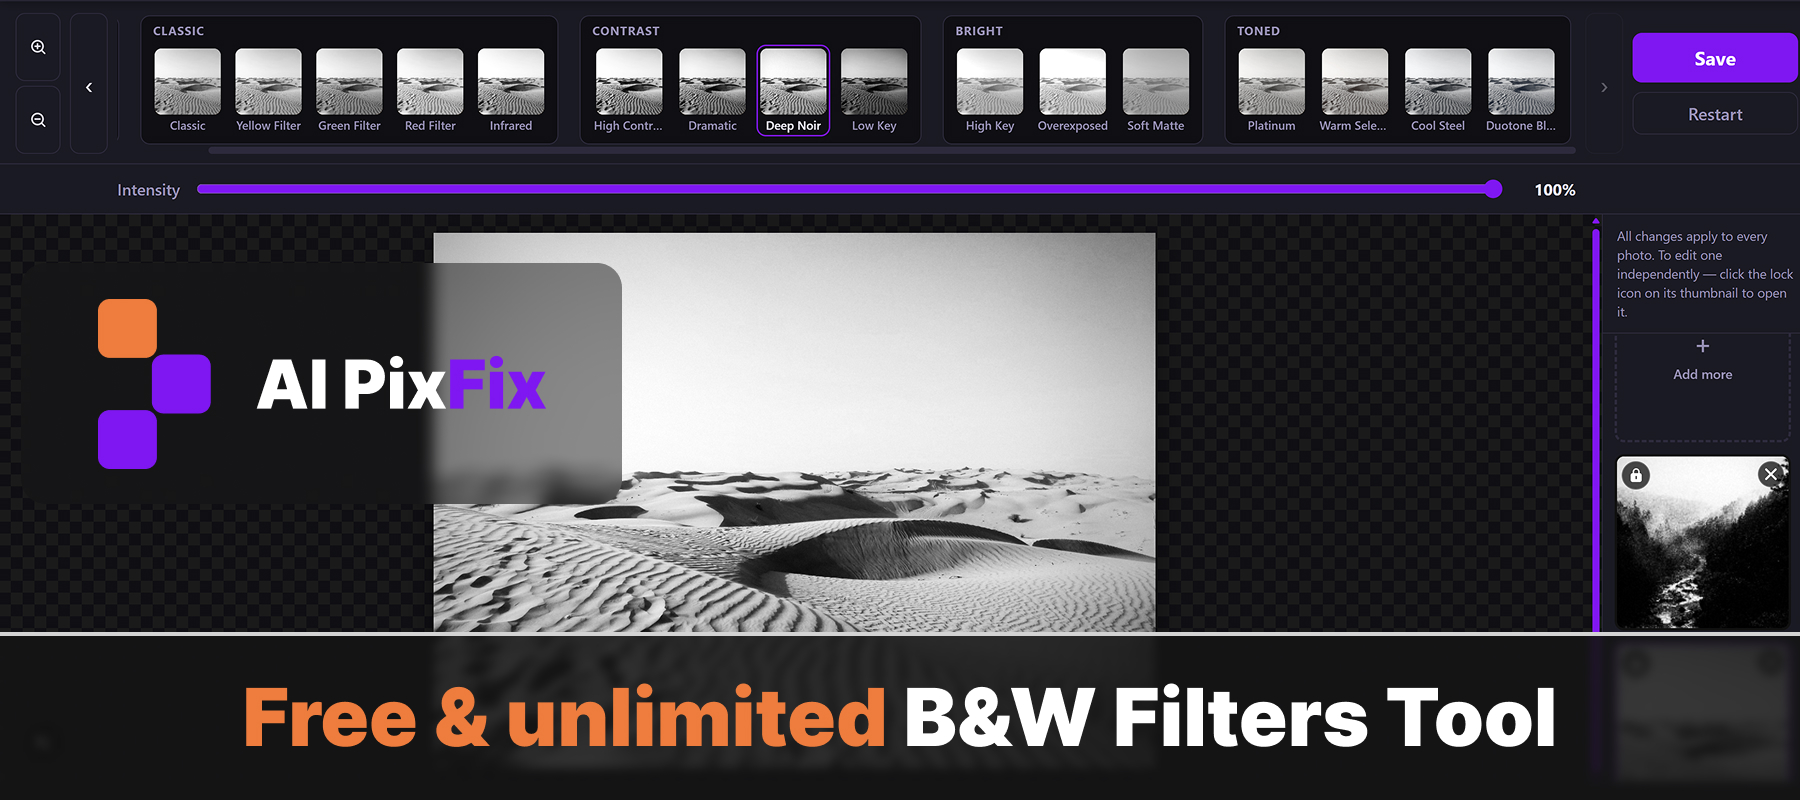
Browse the preset toolbar at the top of the editor. Presets are grouped by visual character: Classic, Contrast, Bright, Toned. Click any thumbnail to apply it to the live preview at full resolution.
Adjust the intensity
The intensity slider runs from 0% (original color photo) to 100% (full black and white conversion). Any value in between crossfades — 80–95% often preserves a trace of skin warmth while reading as fully desaturated.
Save
Click Save. Each photo exports at the full original resolution — JPG at 0.95 quality for JPG and WebP sources, PNG for PNG sources. No watermark, no archive, no quality reduction.
The free B&W portrait filter online runs entirely in your browser — no account, no file size limit, nothing to install.
Intensity slider — partial desaturation and why it matters
The intensity slider blends the B&W filter over the original image on a linear scale: 0% leaves the photo completely unchanged, 100% applies the full conversion. Everything in between is a genuine crossfade — both the channel mix result and the color original contribute to each pixel in proportion.
For portrait work, two ranges are particularly useful. At 80–95%, the image reads as fully black and white but retains a faint warmth in the skin — barely perceptible, but it adds a subtle glow that a hard 100% conversion sometimes flattens. At 50–70%, the result is closer to a faded-color editorial look: the subject retains traces of hue, backgrounds feel muted, and the overall feel is more atmospheric than strictly monochromatic.
Intensity applies to the entire pixel pipeline — channel mix, tone curve, vignette, grain, and split toning all scale together at whatever value you set. AI PixFix renders the export at full original resolution regardless of the intensity value.
Batch portraits — consistent B&W look across a whole session
Upload up to 10 photos at once. By default, every photo in the batch follows the same global black and white filter — change the preset and all of them update together. This is the most efficient workflow for portrait sessions shot under consistent lighting where you want a uniform look across the whole series.
When one photo in the batch needs a different treatment — a different light source, a different subject, or a frame that simply reads better with more contrast — click the lock icon on that thumbnail to break it out of the batch. That photo inherits the current global settings as a starting point, then takes its own preset and intensity independently of everything else. The rest of the batch stays in sync.
The online B&W filter exports each image as a separate file in a single Save pass — no ZIP archive, no watermark, full original dimensions preserved.
Frequently asked questions
What black and white filter works best for skin tones in portraits?
The Red Filter preset weights the red channel at 0.75, which maps warm and pink skin tones to brighter greys while pushing blue and cool tones darker. This creates natural separation between the subject and a neutral or cool background — the same technique used in darkroom film photography with a physical red filter in front of the lens.
Can I control how strong the black and white effect is?
Yes. The intensity slider blends from 0% (the fully original color photo) to 100% (the complete B&W conversion). Any value in between crossfades the two. For portraits, 80–95% often preserves a faint warmth in the skin while reading as fully desaturated; 50–70% produces a faded-color editorial look.
Is the filter applied in my browser or uploaded to a server?
Everything runs in your browser. The pixel pipeline — channel mix, tone curve, vignette, grain, and tinting — is computed via the Canvas API on your device. Your photos are never sent to a server and are not stored anywhere.
What input and output formats are supported?
Input: JPG, PNG, and WebP. Output: JPG at 0.95 quality for JPG and WebP sources; PNG for PNG sources to preserve any transparency. Each photo is exported as a separate file — no ZIP archive, no watermark.
Can I apply different B&W filters to different photos in one batch?
Yes. Upload up to 10 photos at once. By default all photos follow the same global preset and intensity. Click the lock icon on any thumbnail to unlock that photo — it then keeps its own preset and intensity independently of the rest of the batch.
Sixteen black and white filter presets for every portrait mood — from Red Filter skin glow to Platinum toning to Deep Noir — with an intensity slider, batch support for up to ten photos, and per-photo independence. Free, no account, nothing uploaded.
Open the editor